If you’re exploring a roof replacement and researching your options, there’s a good chance you’ve come across the term standing seam metal roof. This sleek, durable roofing style has gained massive popularity among homeowners who want something that looks beautiful and lasts for decades.
It’s no surprise that some ambitious homeowners consider tackling standing seam metal roof installation as a DIY project. After all, how hard could it be to install a standing seam roof with some tools, a ladder, and a weekend?
The truth is, it’s not quite that simple.
In this blog, we’ll walk you through how a standing seam roof system is installed—step by step—so you understand the amount of planning, precision, and experience required. We’ll also explain why professional installation is so important, especially when it comes to performance, appearance, and warranty protection.
What Is a Standing Seam Metal Roof?
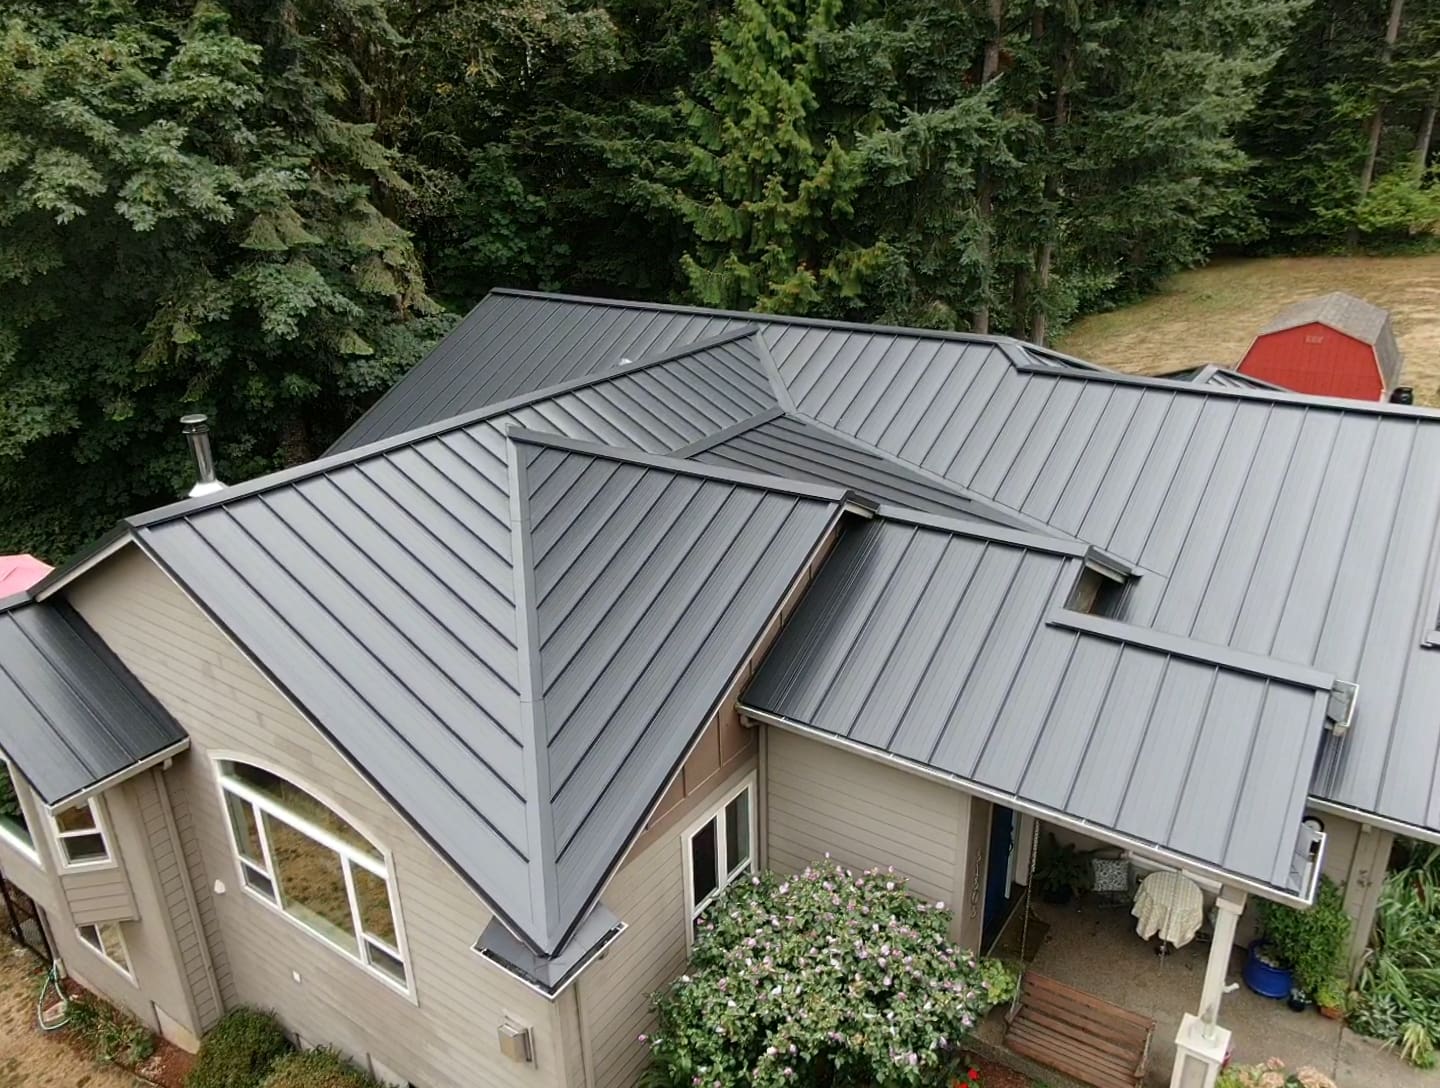
Let’s start with the basics. A standing seam metal roof is made up of metal panels that run vertically from the eaves to the ridge of your roof. These panels are designed to be locked together at the seams, creating a continuous, weather-tight surface with no exposed screws on the field of the roof.
That’s one of the biggest differences between standing seam systems and other types of metal roofing materials. For example, corrugated panels and some exposed fastener systems leave screw heads visible on the roof, which can become weak points over time. Standing seam systems use concealed clips and fasteners, creating a cleaner look and more durable seal.
Homeowners love this roof style for its:
- Aesthetic appeal – Sleek, modern lines that suit both classic and contemporary homes
- Longevity – With proper care and installation, they can last 50+ years
- Low maintenance – Resistant to rot, moss, pests, and fire
- Performance – Designed to shed water and snow easily, reducing the risk of leaks
But none of those benefits mean much if the roof isn’t installed correctly.
Step One: Prep Work Before Installation
A successful seam metal roof installation starts well before the first panel is laid down. Proper prep is essential—and skipping steps can lead to leaks, structural damage, and voided warranties.
1. Remove Existing Roofing (If Necessary)
If your home currently has asphalt shingles or another older material, these may need to be removed. In some cases, a metal roof can be installed over existing shingles, but only if the deck is sound, and local building codes allow it.
Removing the old roof ensures:
- A clean surface for the new system
- Proper attachment of fasteners to the roof decking
- No hidden damage beneath the old material
2. Inspect and Repair the Roof Deck
The roof decking is the solid surface beneath your roofing materials. Before installing anything, it must be inspected for rot, water damage, or structural weakness.
Why it matters: If the deck isn’t secure, your new metal panels could shift, buckle, or fail entirely over time.
3. Install Drip Edge
A drip edge is a metal flashing installed along the roof edges to guide water away from the fascia and prevent it from getting under the roofing material. It’s one of those small details that makes a big difference in performance and longevity.
4. Apply Ice and Water Shield
Especially in colder or wetter climates, an ice and water shield is a must. This waterproof membrane is applied to valleys, eaves, and other vulnerable areas to prevent ice dams and water infiltration.
5. Install Underlayment
The entire roof deck should be covered with a high-quality synthetic underlayment. This acts as a secondary moisture barrier and helps protect your roof if water ever gets under the metal panels.
Taking your time with prep work ensures a solid foundation for the roofing system and prevents future problems.
How Standing Seam Panels Are Installed
Once prep work is complete, the actual seam metal roof installation can begin. Here’s what happens next:
1. Starting at the Eaves
Installation begins at the eaves, or bottom edge of the roof. The first metal panel is aligned and secured using clips that are fastened to the roof deck but hidden beneath the next panel. This is what gives standing seam its seamless, fastener-free appearance.
2. Locking the Panels Together
Each successive panel is installed so that it overlaps and locks together at the seams with the previous panel. These interlocking seams are then folded or crimped closed using specialized tools to ensure a tight, weathertight seal. Proper folding is crucial—too tight and the system can’t breathe, too loose and water gets in.
3. Accommodating Expansion and Contraction
One of the most overlooked aspects of installing standing seam is accounting for how metal expands and contracts with temperature changes. If clips are over-tightened or panels don’t have enough room to move, the result can be warping, buckling, or premature failure.
That’s why high-quality systems use floating clips and slotted holes that let the metal move slightly—without compromising the roof.

Flashing, Trim, and Final Details
Once the panels are installed, finishing touches are applied to seal the system and protect all vulnerable points.
1. Ridge Capping
At the peak of the roof, ridge capping is installed to cover the joint where two slopes meet. This not only keeps water out, but also helps with ventilation when combined with a vented ridge design.
2. Sidewall and Pipe Flashing
Any place where a roof intersects with a wall or pipe—chimneys, skylights, vents—requires custom flashing to divert water away. Improper or rushed flashing is a common cause of leaks, especially with DIY jobs.
3. Install Lock Strips
To keep panels secure at roof transitions, edges, and terminations, it’s essential to install lock strips. These metal components lock panels in place and prevent wind uplift or shifting over time. They also give the roof a clean, finished appearance.
Common Mistakes That Lead to Failure
Installing a standing seam metal roof might seem straightforward on paper, but small errors can result in big headaches. Here are some common issues that arise with DIY or poorly done installations:
- Improper panel alignment leads to a crooked appearance and exposed seams
- Incorrect clip placement can restrict movement and cause panels to buckle as the metal expands and contracts
- Forgetting flashing details opens the door to water infiltration
- Using the wrong tools or failing to crimp seams correctly leads to gaps and vulnerability
- Exposed fasteners on a concealed fastener system can void warranties or damage panels
Speaking of warranties—many manufacturer warranties for metal roofing products require that the metal roof is installed by a certified or trained professional. If you install it yourself or use an inexperienced crew, you may end up with no coverage at all.
Why Professional Installation Matters
Even the best roofing materials won’t perform well without proper installation. A standing seam roof system is a precision product that demands clean lines, accurate measurements, and expert handling.
At Mountaintop Metal Roofing, our team is trained to install these systems to the highest standards. We understand how to align panels, handle roof decking repairs, install underlayment and flashing correctly, and ensure that every seam is sealed for long-term performance. We don’t just make your roof look beautiful—we make sure it performs in every kind of weather.
Every roof we install comes backed by our lifetime, non-prorated, transferable warranty, giving you confidence and peace of mind. You’ll never have to wonder if a missed step or poor fastening will come back to haunt you.
FAQs: Standing Seam Metal Roof Installation
1. Can I install a standing seam metal roof myself?
Technically, yes—but it’s not recommended unless you have professional-level roofing experience. Standing seam metal roof installation requires specialized tools, precise measurements, and an understanding of how metal expands and contracts. Incorrect installation can lead to leaks, warped panels, and voided warranties.
2. What makes standing seam different from other metal roofs?
The key difference is how the standing seam panels are joined—each panel is locked together at the seams using hidden fasteners. This concealed design creates a cleaner look and better weather resistance than exposed fastener systems like corrugated metal roofing.
3. Do I need to remove my old asphalt shingles before installing a metal roof?
In most cases, yes. Removing old asphalt shingles allows for a thorough inspection of the roof decking and ensures the new roof system is level, stable, and properly sealed with underlayment and ice and water shield. Skipping tear-off may cause long-term issues.
4. What are lock strips, and why are they important?
Lock strips are metal trim pieces installed at roof edges, eaves, or transitions. They anchor the bottom of each panel to prevent shifting or wind uplift. Without them, even properly installed panels can come loose or misalign over time.
5. Will installing the roof myself affect the warranty?
Yes—many manufacturer warranties require that the metal roof is installed by certified professionals. DIY installation can void your warranty, leaving you unprotected if something goes wrong later.
It’s More Than Just a Roof—It’s a System
A standing seam metal roof is a long-term investment. And like any investment, it should be handled with care. The success of your roof depends on every layer of preparation, every clip and seal, and every finishing touch. Skipping a step or misjudging an angle can compromise the entire roof system.
While we admire the enthusiasm of DIYers, standing seam metal roof installation is one of those projects where the stakes are just too high. Save yourself the stress, risk, and potential repair costs—call in the pros who specialize in it.
Ready for a Roof That Works as Good as It Looks?
At Mountaintop Metal Roofing, we believe your roof should be the last one you ever buy. With expert installation, premium materials, and a team that’s dedicated to getting it right the first time, you’ll enjoy a roof that offers beauty, strength, and peace of mind.
Whether you’re considering a full roof replacement or just exploring your options, we’re here to answer your questions and help you feel confident in your next step.
Contact us today to schedule a free quote and learn more about installing your new standing seam metal roof the right way—with Mountaintop Metal Roofing by your side.